自分用レポヨスタイルの使い方【LaTeXマクロ】
updated@2025-12-21
私が普段使っているLaTeXマクロの使い方をクソ雑にまとめます
自分用 sty ファイルを作る
これをすると,毎回プリアンブルに同じクソ長宣言書かずに済む.
まずファイルの用意.
- 拡張子が
.styのファイルを作成する(ファイル名は他のパッケージ名と被らないように) - プリアンブルに書いてた宣言を,いま作成したstyファイルに書き込む
最後に,ビルドエンジンが読み込んでくれる場所にstyファイルを配置する.
OSがWindows10で,Tex Liveを使用している場合,%USERPROFILE%\texmf\tex\latex\ファイル名\ファイル名.styに配置すれば自動で読み込んでくれる.
例: own.styというファイル名にした場合) C:\Users\loliver\texmf\tex\latex\own\own.sty
ほかの環境は存じ上げません.
もし読み込んでもらえない場合は,コマンドプロンプト等で
mktexlsrというコマンドを実行してみてください.表紙
コマンド名 | 意味 | 必須 | 例 |
|---|---|---|---|
title | タイトル | Yes | 情報工学実験 |
subtitle | サブタイトル | VHDL演習 | |
gakka | 学科名 | アアア工学科 | |
grade | 学年 | 255 | |
stuid | 学生番号 | 65535 | |
author | 名前 | Yes | ろりば |
expdate | 実験日 | 2021年4月20日 | |
date | 提出日 | Yes | \today |
coauthor | 共同実験者名 |
\usepackage{ifthen}

\makeatletter
\def\subtitle#1{\def\@subtitle{#1}}
\def\gakka#1{\def\@gakka{#1}}
\def\grade#1{\def\@grade{#1}}
\def\stuid#1{\def\@stuid{#1}}
\def\expdate#1{\def\@expdate{#1}}
\def\coauthor#1{\def\@coauthor{#1}}
\global\let\@subtitle\@empty
\global\let\@gakka\@empty
\global\let\@grade\@empty
\global\let\@stuid\@empty
\global\let\@expdate\@empty
\global\let\@coauthor\@empty
\newcommand{\maketitlepage}{% マクロ名
  \thispagestyle{empty}  % ベージ番号なし
  \null\vfill
  \begin{center}
    {\Huge \sffamily \@title \par}
    \ifthenelse{\equal{\@subtitle}{}}{}{%
      \vspace{5mm}
      {\LARGE \sffamily \@subtitle \par}
    }
    \vspace{20mm}
    {\Large \@gakka \ \@grade 年 \@stuid 号 \par}
    \vspace{3mm}
    {\Large \@author \par}
    \vspace{8mm}
    \begin{table}[H]
      \Large \centering
      \begin{tabular}{rl}
        \ifthenelse{\equal{\@expdate}{}}{}{%
          実験日: & \@expdate\\
        }
        提出日: & \@date
      \end{tabular}
    \end{table}
    \vspace{8mm}
    \ifthenelse{\equal{\@coauthor}{}}{}{%
      {\Large 共同実験者:\hspace{1mm}}
      \begin{minipage}[t]{14em}
          \begin{flushleft}
            \Large \@coauthor
          \end{flushleft}
      \end{minipage}
    }
  \end{center}
  \vfill
  \clearpage
  \setcounter{page}{1}  % ここからページ番号振り始め
  \pagestyle{plain}
}
\makeatother
ifthenというパッケージで条件分岐をしています.
titleおよびsubtitleのみゴシック体としておりますが,お好みで変更してください.使用例
\documentclass[a4j,10ptj]{bxjsarticle}
\usepackage{own}

\title{own パッケージ}
\subtitle{サンプル集}
\gakka{アアア科}
\grade{15}
\stuid{255}
\author{ろりば}
\expdate{2021年5月18日}
\date{\today}
\coauthor{アペイリア\\桐島三羽}

\begin{document}
  \maketitlepage
\end{document}
画像挿入簡略化
includegraphicsマクロ
\newcommand{\inputpic}[2]{%
\includegraphics[width={#2}\linewidth]{#1}}
使用例
\begin{figure}[H]
  \centering
  % 第1引数: 画像アドレス | 第2引数: 出力画像サイズ(親環境基準)
  \inputpic{../img/riddlejoker_20200704_162450.png}{.7}
  \caption{inputpic使用例}
  \label{fig:1}
\end{figure}
\cref{fig:1}に私の妹と公開鍵を示す.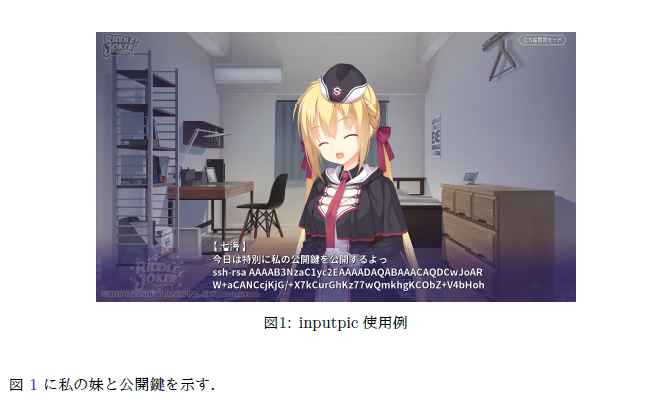
minipageマクロ
\newcommand{\twocolpage}[2]{%
\begin{minipage}[b]{.5\linewidth}\centering #1\end{minipage}%
\begin{minipage}[b]{.5\linewidth}\centering #2\end{minipage}}
使用例
\begin{figure}[H]
  \centering
  \twocolpage{
    \inputpic{../img/step-function.pdf}{.9}
    \subcaption{ステップ関数}
  }{
    \inputpic{../img/sigmoid.pdf}{.9}
    \subcaption{シグモイド関数}
  }
  \twocolpage{
    \inputpic{../img/ReLU.pdf}{.9}
    \subcaption{ReLU関数}
  }{}
  \caption{twocolpage使用例}
\end{figure}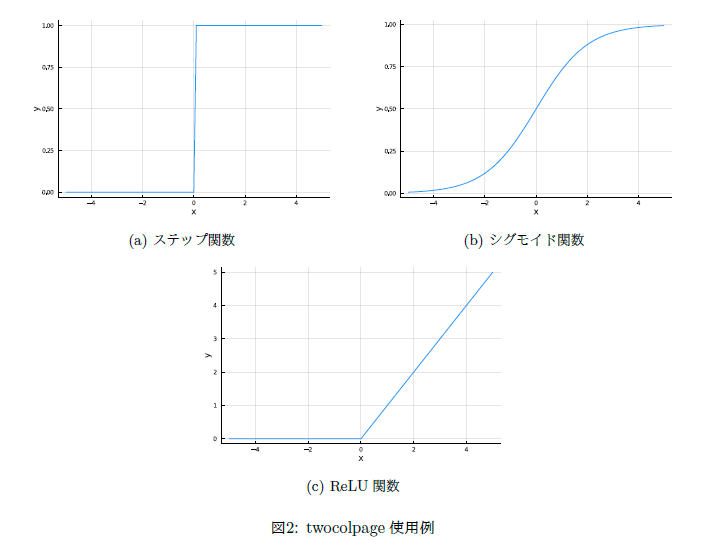
3つ以上の画像を2列で並べること以外にも,単に部分的に二段組をしたい場合にも利用できます.
画像2列
\newcommand{\twofigure}[4][h]{%
\begin{figure}[#1]\centering\twocolpage{#2}{#3}#4\end{figure}}
使用例
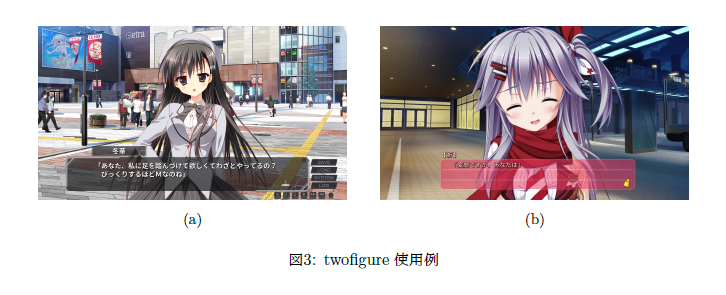
\twofigure[H]{
  \inputpic{../img/fuyuka02.png}{.9}
  \subcaption{}
}{
  \inputpic{../img/inori03.png}{.9}
  \subcaption{}
}{
  \caption{twofigure使用例}
}
ソースコード
\usepackage{listings}
\lstdefinestyle{ex}{
  frame={trbl},
  frameround={tttt},
  lineskip=-0.7ex,
  numbers=none
}
\lstdefinestyle{default}{
  basicstyle=\ttfamily,
  commentstyle = {\color[cmyk]{1,0.4,1,0}},
  classoffset = 0,  %関数名等の色の設定
  keywordstyle = {\bfseries \color{magenta}},  %キーワード(int, ifなど)の書体
  keywordstyle = [2]{\bfseries \color[rgb]{1,0.55,0}},
  keywordstyle = [3]{\bfseries \color[rgb]{0.28,0.24,0.545}},
  keywordstyle = [4]{\bfseries \color{cyan}},
  keywordstyle = [5]{\bfseries \color[rgb]{0,0.5,0}},
  stringstyle = {\ttfamily \color[rgb]{0,0,1}},  %""で囲まれたなどの"文字"の書体
  breaklines=true,  %枠外に行った時の自動改行
  escapechar=\`,
  columns=[l]{fullflexible},
  keepspaces=true,
  showstringspaces=false,
  xrightmargin=0em,
  xleftmargin=1em,
  stepnumber=1,
  lineskip=-0.5ex,
  frame={lRtB},
  frameround={nnnn},
  numberstyle={\scriptsize},
  numbers=left
}

\lstset{style=default}  % set default style
\renewcommand{\lstlistingname}{ソースコード}
% 文書全体のデフォルト言語変更したけりぇ\lstset{language=言語名}すっべ
% プレーンテキスト出したけりゃ\lstset{language=}
% \lstlistoflistings でListingsの目次作るよ
% Importing code from file
% \lstinputlisting[language=Haskell, caption=Haskell sample code]{sample.hs}
使用例
% C++のソースコードを直接書き込む場合
\begin{lstlisting}[language=c++]
#include <iostream>
using namespace std;

int main(){
    cout << "Hello, world!" << endl;
}
\end{lstlisting}

% 出力結果用.等幅フォントでシンタックスハイライトなし
\begin{lstlisting}[style=ex]
Hello, world!
\end{lstlisting}

% ソースファイルを読み込ませる場合
\lstinputlisting[caption=sample.cpp, label=src:sample]{../src/sample.cpp}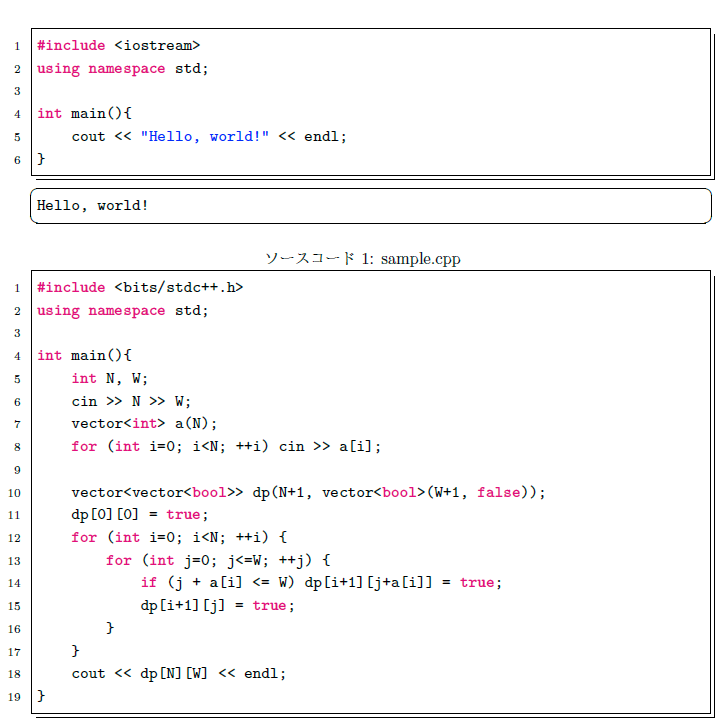
\lstset{language=c++}で,デフォルトの言語を設定しておける.相互参照
\usepackage{hyperref}
\hypersetup{
  setpagesize=false,
  bookmarksnumbered=true,
  bookmarksopen=true,
  colorlinks=true,
  linkcolor=blue,
  citecolor=red,
}

\usepackage[noabbrev]{cleveref}
% crefをrefと見せかける
% hyperrefと併用できない感じか?
\let\nref\ref
\let\ref\cref

% 参照フォーマット
\crefname{equation}{式}{式}
\crefname{figure}{図}{図}
\crefname{subfigure}{図}{図}
\crefname{table}{表}{表}
\crefname{subtable}{表}{表}
\crefname{appendix}{付録}{付録}
\crefname{subappendix}{付録}{付録}
\crefname{subsubappendix}{付録}{付録}
\crefname{subsubsubappendix}{付録}{付録}
\crefformat{lstlisting}{{ソースコード}#2#1#3}
\crefrangeformat{lstlisting}{{ソースコード}#3#1#4{--}#5#2#6}
\crefmultiformat{lstlisting}{{ソースコード}#2#1#3}{, {ソースコード}#2#1#3}{, #2#1#3}{, {ソースコード}#2#1#3}
\crefformat{page}{#2#1#3{ページ}}
\crefrangeformat{page}{#3#1#4{--}#5#2#6{ページ}}
\crefmultiformat{page}{#2#1#3{ページ}}{, #2#1#3{ページ}}{, #2#1#3}{, #2#1#3{ページ}}
\crefformat{section}{#2#1#3{章}}
\crefrangeformat{section}{#3#1#4{--}#5#2#6{章}}
\crefmultiformat{section}{#2#1#3{章}}{, #2#1#3{章}}{, #2#1#3}{, #2#1#3{章}}
\crefformat{subsection}{#2#1#3{節}}
\crefrangeformat{subsection}{#3#1#4{--}#5#2#6{節}}
\crefmultiformat{subsection}{#2#1#3{節}}{, #2#1#3{節}}{, #2#1#3}{, #2#1#3{節}}
\crefformat{subsubsection}{#2#1#3{節}}
\crefrangeformat{subsubsection}{#3#1#4{--}#5#2#6{節}}
\crefmultiformat{subsubsection}{#2#1#3{節}}{, #2#1#3{節}}{, #2#1#3}{, #2#1#3{節}}
% \crefformat{part}{{第}#2#1#3{部}}
% \crefformat{chapter}{{第}#2#1#3{章}}
\def\crefrangeconjunction{--}
\def\crefpairconjunction{, }
\def\crefmiddleconjunction{, }
\def\creflastconjunction{, }
\def\crefpairgroupconjunction{, }
\def\crefmiddlegroupconjunction{, }
\def\creflastgroupconjunction{, }
使用例
\begin{align}
  E = mc^2 \label{eq:eq1}
\end{align}

\cref{eq:eq1}
参照時のスタイルを定義できる.
サイズ自動調整括弧
\newcommand{\paren}[1]{\left(#1\right)}
\newcommand{\Brace}[1]{\left\{#1\right\}}
\newcommand{\sbra}[1]{\left\lbrack#1\right\rbrack}
\newcommand{\abra}[1]{\left\langle#1\right\rangle}
\newcommand{\abs}[1]{\left|#1\right|}
\newcommand{\norm}[1]{\left\|#1\right\|}
使用例
$x \paren{\frac{1}{2}x + 1}$
出典
サイズ指定括弧
\makeatletter
\newcommand{\vast}[1]{\bBigg@{#1}}
\makeatother
詳細
×10^n
% \times 10^{n}
\newcommand{\sipre}[1]{\times10^{#1}}
(より的確な名前,募集してます……)
使用例
$6.67 \sipre{-3}$
スポンサーリンク